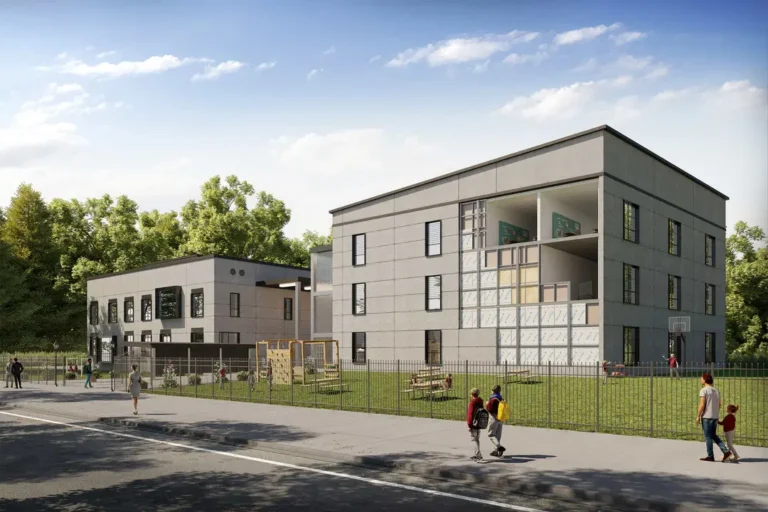
How to Avoid Facade Installation Risks: A Definitive Guide
The building envelope represents the most volatile phase of a construction project’s lifecycle. While internal structural work is largely protected from the elements and follows predictable logistical paths, the installation of the facade occurs at the mercy of environmental variables, shifting wind loads, and the geometric complexities of the as-built structure. How to Avoid Facade Installation Risks. A facade is not a singular product but a high-precision assembly of thousands of components, each requiring exact alignment to ensure the building remains airtight, watertight, and thermally efficient for decades.
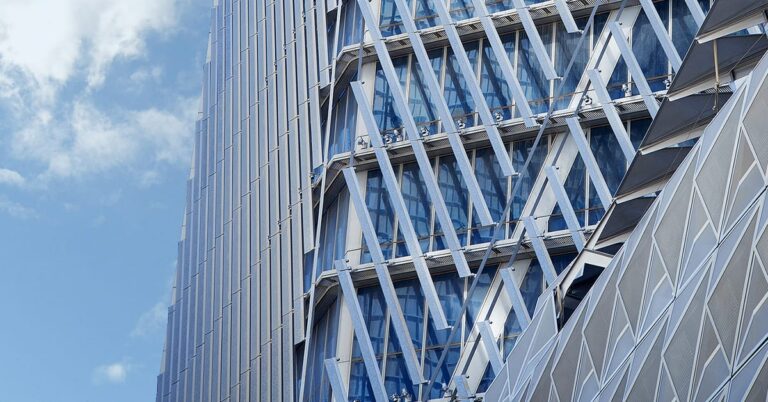
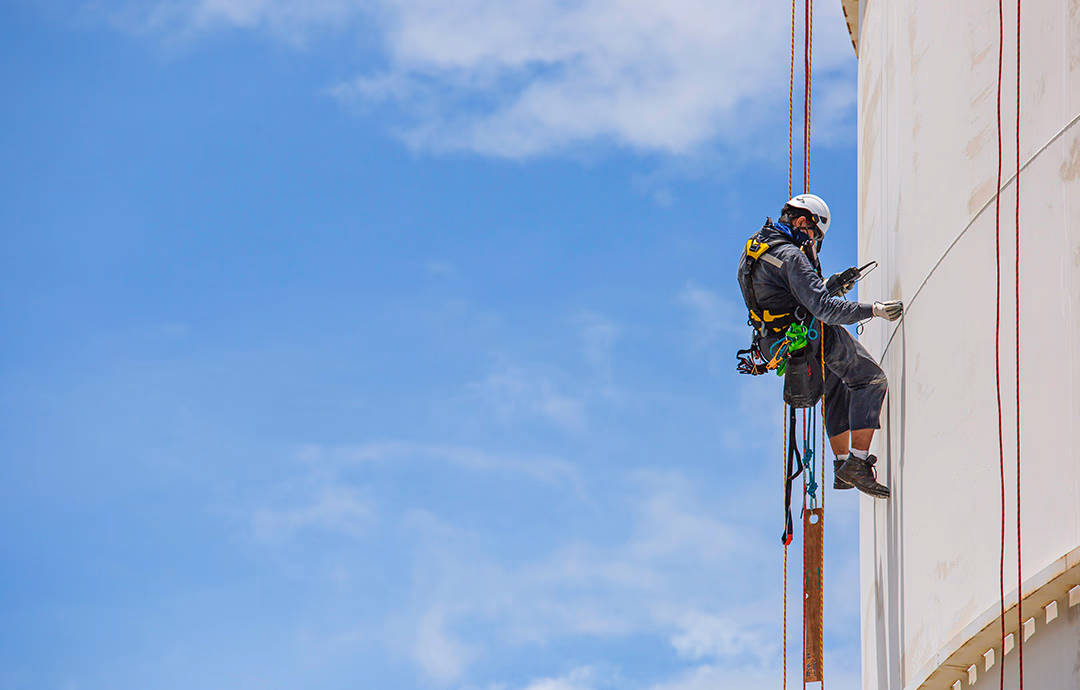
The technical stakes of installation are profoundly high. Modern building skins are increasingly lightweight and high-performing, which means they possess less inherent “redundancy” than the heavy masonry walls of the past. A single millimeter of misalignment in a unitized curtain wall bracket or a improperly torqued fastener in a rainscreen system can trigger a cascade of structural fatigue and moisture intrusion. Because these systems are often installed hundreds of feet in the air, the physical risks to labor and the public are matched only by the financial risks to the developer and the insurance carrier.
Navigating this landscape requires more than just adherence to a manufacturer’s manual. It demands a sophisticated understanding of site logistics, material physics, and the human factors that lead to errors on the assembly line. To ensure a building reaches its intended design life, the focus must shift from “finishing the skin” to “engineering the installation.” This analysis serves as a definitive reference for identifying, mitigating, and managing the various vectors of risk that manifest during the critical transition from shop drawings to the physical horizon of the city.
Understanding “how to avoid facade installation risks”
In the context of professional architectural execution, the challenge of how to avoid facade installation risks is frequently reduced to a matter of site safety or worker fall protection. While life safety is paramount, this perspective is dangerously narrow. Installation risk encompasses the entire spectrum of technical, financial, and legal vulnerabilities that arise when a building’s environmental barrier is improperly realized. A project may have zero on-site accidents yet still suffer from a catastrophic installation failure that manifests as chronic water leakage three years post-completion.
One of the most common oversimplifications is the assumption that “prefabrication” automatically eliminates risk. While unitized systems move much of the labor into a controlled factory environment, they introduce “logistical fragility.” A single panel damaged during crane-lifting or a bracket that was welded slightly out of plumb on the concrete slab can halt the entire production line. Therefore, avoiding risk is as much about managing the “tolerance gap” between the precise factory-made facade and the less-precise, cast-in-place concrete structure as it is about the installation itself.
Oversimplification also occurs regarding material compatibility. Installers often focus on the primary cladding—glass, metal, or stone—while neglecting the “accessory” materials like sealants, gaskets, and thermal shims. If a chemical reaction occurs between an unapproved sealant and a high-performance membrane, the entire air barrier can degrade. A professional editorial approach to avoiding these risks must prioritize the “interstitial details”—the points where different materials and trades meet—as these are the primary sites of systemic failure.
The Systemic Evolution of Installation Hazards
Historically, facade installation was a slow, additive process. Masonry units were stacked one by one, allowing for constant field adjustments and a high degree of structural redundancy. If a brick was slightly out of alignment, the mortar bed could absorb the discrepancy. The risk was primarily focused on the physical endurance of the laborer and the slow, steady progression of the wall.
The shift toward the “Curtain Wall” in the 20th century decoupled the skin from the structure, introducing the concept of “lightweight tension.” Suddenly, installation speed increased, but so did the precision required. We moved from a world of “inches and mortar” to a world of “millimeters and silicone.” This evolution meant that errors became less visible to the naked eye but more impactful to the building’s performance.
Today, the evolution has reached a state of “high-performance complexity.” We are now installing “smart” facades that include integrated sensors, motorized louvers, and complex triple-glazing. The risks have evolved from simple structural collapse to include mechanical failure and software incompatibility. Modern installation requires a hybrid of traditional craftsmanship and aerospace-level engineering precision.
Conceptual Frameworks for Risk Mitigation
To navigate the complexity of on-site work, project managers utilize specific mental models to categorize and preempt potential failures.
-
The Tolerance Buffer Model: This framework assumes that the structural frame (concrete or steel) will never be perfect. It mandates the use of “three-way adjustable” brackets that allow the facade to be leveled independently of the building’s deviations. The limit of this model is “over-adjustment,” where a bracket is pushed beyond its load-bearing center to compensate for a major structural error.
-
The First-Sequence Mock-up (FSM): This model treats the first three days of installation as a “live laboratory.” Instead of rushing to finish, the team installs a small section, then subjects it to rigorous water and air testing on-site. The limitation is the potential for schedule delays if early errors are discovered.
-
The “Chain of Custody” Framework: This tracks every component from the factory floor to the final bolt-tightening. It ensures that if a batch of glass or a specific set of fasteners is found to be defective, every affected panel can be identified immediately.
Categories of Installation Variations and Trade-offs
The method of installation dictates the specific risk profile of the project. Choosing the wrong method for the site conditions is a primary driver of cost overruns.
| Installation Method | Logistical Logic | Primary Risk | Primary Benefit |
| Unitized (Panelized) | Factory-built modules | Shipping/Lifting damage | Extreme speed; High QC |
| Stick-Built | On-site assembly | Weather delays; Human error | High geometric flexibility |
| Rainscreen (Cladding) | Multi-layer additive | Improper joint venting | Superior moisture control |
| Precast Concrete | Heavy-lift panels | Connection fatigue; Weight | Fire safety; Durability |
| Point-Supported | Tension/Cable rigging | Precise glass tolerances | Maximum transparency |
| Mast Climber Access | Mechanized platform | Mechanical failure/Stalling | Safer for long horizontal spans |
Decision Logic for Risk Avoidance
Selecting between these methods requires an assessment of “site congestion.” In a dense urban core where sidewalk closures are restricted, Unitized systems are the standard because they eliminate the need for extensive scaffolding. However, if the building has a highly irregular shape with few repeating patterns, a Stick-Built approach allows the installers to “carve” the facade to fit the reality of the structure, reducing the risk of custom-ordered panels not fitting.
Detailed Real-World Scenarios How to Avoid Facade Installation Risks
Scenario 1: The High-Rise Glass Fracture
During the installation of a unitized curtain wall in a high-wind environment, several glass lites spontaneously shattered.
-
Root Cause: “Nickel Sulfide” inclusions in the tempered glass, exacerbated by improper handling during the “hooking” phase of the crane lift.
-
Failure Mode: The panels were stored on-site in a way that allowed “edge-to-edge” contact, creating microscopic chips that failed under wind load.
-
Mitigation: Mandatory “heat soaking” of glass and the use of padded storage racks.
Scenario 2: The Leaky Rainscreen Transition
A new institutional building with a ceramic rainscreen experienced water damage in the first heavy storm.
-
Root Cause: The installer failed to “lap” the vapor barrier over the window flashing, creating a “reverse-shingle” effect that channeled water into the wall.
-
Constraint: The schedules for the window trade and the cladding trade were not coordinated.
-
Second-Order Effect: Mold growth in the interior gypsum board required a $200,000 remediation.
Planning, Cost, and Resource Dynamics
The economics of risk avoidance are often skewed toward “prevention” rather than “rectification.”
| Budget Item | % of Facade Cost | Impact on Risk Reduction |
| Third-Party Inspection | 1% – 3% | High (Unbiased quality checks) |
| On-site Water Testing | 2% – 4% | Very High (Finds leaks early) |
| Custom Lifting Jigs | 1% | Moderate (Prevents panel damage) |
| Specialized Training/Cert | 1% | High (Reduces human error) |
| Contingency Fund | 5% – 10% | Financial only (Does not fix physics) |
The “Cost of Rework”
It is an industry axiom that fixing a seal in the factory costs $1.00; fixing it on-site before the scaffold is removed costs $10.00; and fixing it after the building is occupied and the scaffold is gone costs $100.00. Investing in high-level site supervision is not an “extra” cost; it is a direct reduction of the most expensive line item in construction: rework.
Support Systems, Tools, and Strategic Monitoring
To maintain the integrity of the installation, several technical support systems must be deployed.
-
3D Laser Scanning: Used to “map” the concrete slab edges before installation. This identifies where the building is “out of plumb” so the facade brackets can be pre-adjusted.
-
Calibrated Torque Wrenches: Ensuring every structural bolt is tightened to the exact foot-pound specified by the engineer. Over-tightening is as dangerous as under-tightening.
-
Vacuum Lifting Cups: Specialized equipment that allows for the precise placement of large glass lites without manual handling of the edges.
-
Hygrometers and Temp Gauges: Monitoring the “Dew Point” on-site. If it is too cold or too humid, sealants will fail to bond correctly to the substrate.
-
Drone Inspections: Providing high-resolution imagery of hard-to-reach joints and flashings that a human inspector might miss from a scaffold.
-
Digital “Field Reports”: Real-time documentation where every joint is photographed and geotagged before it is “closed up” by the next layer of cladding.
The Taxonomy of Compounding Risks
Risk in facade installation rarely occurs in a vacuum; it is usually a compounding sequence of events.
-
The “Trade-to-Trade” Handover: This is the highest risk point. The steel contractor finishes, and the facade contractor begins. If the steel contractor left a bolt head protruding by half an inch, the facade panel cannot sit flush.
-
The “Weather-Tight” Deadline: Projects often rush the facade to “dry-in” the building so interior work can begin. This pressure leads to “shortcut sealing”—applying caulk to wet or dirty surfaces, which will fail within 24 months.
-
Structural Creep: Concrete buildings “settle” and “shrink” over the first two years. If the facade installation did not include “expansion joints” that allow for this vertical movement, the glass will eventually “bind” and explode.
Long-Term Governance and Quality Assurance
A successful installation includes a “Governance Plan” that begins the moment the installers leave the site.
The Quality Assurance Checklist
-
Daily Log Review: Ensuring that all “pull tests” for fasteners were recorded and passed.
-
Sealant “Peel Tests”: Randomly selecting finished joints to ensure the chemical bond is meeting manufacturer specifications.
-
Glazing Gasket Verification: Ensuring that the rubber gaskets are not “stretched” during installation, as they will shrink back over time and create gaps.
-
Transition Documentation: A photographic record of every “buried” detail (like the flashing behind a stone panel) that cannot be seen once the building is finished.
Metrics, Tracking, and Evaluative Signals
How do we quantify the avoidance of risk?
-
Leading Indicators: The ratio of “passed” to “failed” on-site water tests; the percentage of brackets that required “out-of-tolerance” engineering approvals.
-
Lagging Indicators: The number of warranty claims in the first 24 months; the actual energy performance of the HVAC system (detecting air leaks).
-
Qualitative Signals: The cleanliness and organization of the “staging area.” A chaotic site is statistically more likely to produce damaged panels and poor sealant application.
Correcting Industry Misconceptions
-
“Sealant can fix anything”: Sealant is a secondary barrier. If the mechanical flashing is wrong, caulk will only delay the leak by a few years.
-
“Heavier panels are safer”: Heavier panels (like precast) put more stress on the structural connections and are more difficult to align safely.
-
“Factory-glazed means zero leaks”: Even a perfect factory panel will leak if the “field joints” between the panels are installed poorly.
-
“Wind only pushes”: Wind also “sucks” (suction). Many facade panels fail because they were not designed for the negative pressure that pulls them away from the building.
-
“The inspector will catch it”: Building inspectors rarely have the time to check every single fastener on a 40-story building. Quality is the responsibility of the installer.
Synthesis and Strategic Adaptability
The ultimate strategy for how to avoid facade installation risks is the cultivation of a “culture of precision.” This requires a shift from viewing the facade as a commodity to viewing it as a high-precision laboratory project realized in a chaotic environment. The most successful projects are those that acknowledge the fallibility of the structural frame and build “tolerance” into every bracket and joint. By prioritizing the “interstitial” spaces—where materials meet and trades hand off—the building skin transforms from a liability into a high-performing, multi-decadal asset.